New Products at the Pomona Off Road Show October 2008
New Products
I attended the Pomona Off-Road Expo at the Fairplex this past weekend. I enjoyed talking to all the vendors and looking at some of the new products. I hope you were able to attend also. There were a few products that caught my eye that I wanted to share with you.
Trac Tools
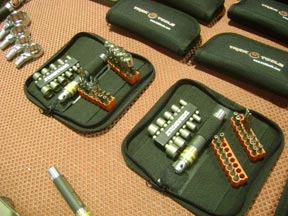
First up, I found these small tool sets made in the USA. There are sold by Trak Tools. The Ready Wrench has a T handle so you can put some torque on stuff and is equipped with a magnetic socket drive. This kit was designed for Motorcycle riders where space is a premium. For those days when you forgot to bring your big tool kit, it sure would be nice to find this set in the glove box! There are a variety of sockets, bits, torxs, and allens in both SAE and metric.
Contact information: 562-690-9469 www.info@traktools.com www.traktools.com http://www.daystarweb.com/http://www.traktools.com/
What is It?
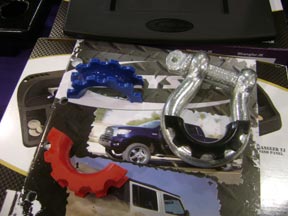
Daystar has a new product that will be officially released at SEMA in November. These little plastic clips will keep your clevis from rattling if you drive around with your clevis attached to the bumper. I doubt You will find it on the web site yet. Look for it in your favorite off-road store later this year.
http://www.daystarweb.com
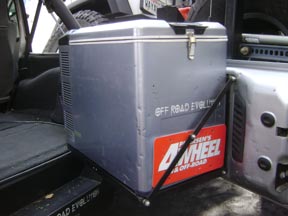
Mount for Hi-lift Jack Base
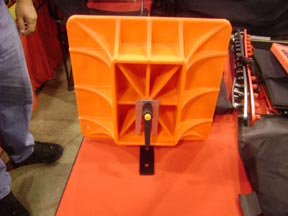
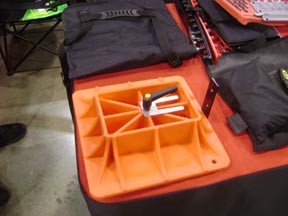
I generally do not carry my hi-lift jack base except when I plan to do a demo. It is difficult to pack and store. And yet the Hi-lift Jack base is really the best solution for a strong solid base. This is a prototype that will soon be on the market. This may well solve that problem. It can be bolted to any flat surface.
Phone: 520-579-2079
http://offroadtrailtools.com/
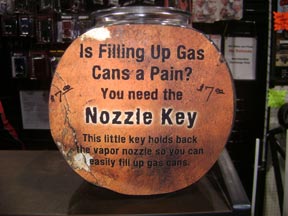
Nozzle Key

In order to fill your 5 gallon jerry can all the way up (at least in California) you have to hold back the front of the nozzle for the last 1 and half or 2 gallons. This tool frees your other hand and allows you more control over the process. Just slip one of these over the nozzle to hold it back.
Phone: 520-579-2079
http://offroadtrailtools.com
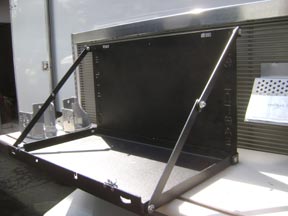
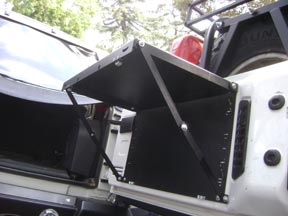
Jeep JK Trail Table
This is a very useful table now that Jeeps no longer have drop down tail gates. This one is designed for the New JK Wrangler but Mel says it will work on the early TJ's with the flat inside tail gate.
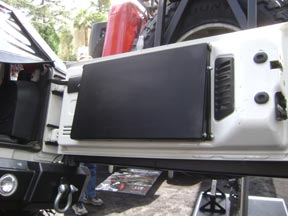
It can be mounted 3 ways. Mel said it will support 180 pounds or more.
Phone: 714-870-5515
http://www.offroadevolution.com/
The next show I will attend is the SEMA Show in Las Vegas in early November. Let me know what stuff you are interested in having me look for. I can't promise anything but it might happen if I know in advance!
I hope to see you on the trails!
Tom Severin, President
Badlands Off Road Adventures, Inc
4-Wheel Drive School
310-374-8047
http://www.4x4training.com
Make it Fun. Make it Safe.
###
Want To Use This Article In Your Magazine, E-Zine, Club Newsletter Or Web Site? You are welcome to use it anytime, just be sure to include the following author/copyright information:
Tom Severin, 4x4 Coach, teaches 4WD owners how to confidently and safely use their vehicles to the fullest extent in difficult terrain and adverse driving conditions. Visit www.4x4training.com to develop or improve your driving skill.
Copyright 2008, Badlands Off-Road Adventures, Inc.
I attended the Pomona Off-Road Expo at the Fairplex this past weekend. I enjoyed talking to all the vendors and looking at some of the new products. I hope you were able to attend also. There were a few products that caught my eye that I wanted to share with you.
Trac Tools
First up, I found these small tool sets made in the USA. There are sold by Trak Tools. The Ready Wrench has a T handle so you can put some torque on stuff and is equipped with a magnetic socket drive. This kit was designed for Motorcycle riders where space is a premium. For those days when you forgot to bring your big tool kit, it sure would be nice to find this set in the glove box! There are a variety of sockets, bits, torxs, and allens in both SAE and metric.
Contact information: 562-690-9469 www.info@traktools.com www.traktools.com http://www.daystarweb.com/http://www.traktools.com/
What is It?
Daystar has a new product that will be officially released at SEMA in November. These little plastic clips will keep your clevis from rattling if you drive around with your clevis attached to the bumper. I doubt You will find it on the web site yet. Look for it in your favorite off-road store later this year.
http://www.daystarweb.com
Mount for Hi-lift Jack Base
I generally do not carry my hi-lift jack base except when I plan to do a demo. It is difficult to pack and store. And yet the Hi-lift Jack base is really the best solution for a strong solid base. This is a prototype that will soon be on the market. This may well solve that problem. It can be bolted to any flat surface.
Phone: 520-579-2079
http://offroadtrailtools.com/
Nozzle Key
In order to fill your 5 gallon jerry can all the way up (at least in California) you have to hold back the front of the nozzle for the last 1 and half or 2 gallons. This tool frees your other hand and allows you more control over the process. Just slip one of these over the nozzle to hold it back.
Phone: 520-579-2079
http://offroadtrailtools.com
Jeep JK Trail Table
This is a very useful table now that Jeeps no longer have drop down tail gates. This one is designed for the New JK Wrangler but Mel says it will work on the early TJ's with the flat inside tail gate.
It can be mounted 3 ways. Mel said it will support 180 pounds or more.
Phone: 714-870-5515
http://www.offroadevolution.com/
The next show I will attend is the SEMA Show in Las Vegas in early November. Let me know what stuff you are interested in having me look for. I can't promise anything but it might happen if I know in advance!
I hope to see you on the trails!
Tom Severin, President
Badlands Off Road Adventures, Inc
4-Wheel Drive School
310-374-8047
http://www.4x4training.com
Make it Fun. Make it Safe.
###
Want To Use This Article In Your Magazine, E-Zine, Club Newsletter Or Web Site? You are welcome to use it anytime, just be sure to include the following author/copyright information:
Tom Severin, 4x4 Coach, teaches 4WD owners how to confidently and safely use their vehicles to the fullest extent in difficult terrain and adverse driving conditions. Visit www.4x4training.com to develop or improve your driving skill.
Copyright 2008, Badlands Off-Road Adventures, Inc.
posted by Tom Severin at 6:43 PM
0 comments
![]()
